How Do I Install Crown Molding On Kitchen Cabinets - How To Install Crown Molding To Kitchen Cabinets : We spent a week at our mountain cottage a couple of weeks ago and one of the projects he finished was installing the crown molding on the cabinets.
How Do I Install Crown Molding On Kitchen Cabinets - How To Install Crown Molding To Kitchen Cabinets : We spent a week at our mountain cottage a couple of weeks ago and one of the projects he finished was installing the crown molding on the cabinets.. It is the bottoms of the cabinets that need to line up not the gap between the top and ceiling. I chose a torx (star) head because i tend to strip phillips head screws when applying pressure over my head. Secure the crown molding when installing on a wall, use the pneumatic nailer to secure the crown molding at the wall studs. Measure the length of the front and sides of your cabinet. Mark all sides of the cabinet onto which you will be attaching crown moulding.
Make sure that their size is the same as your moldings. For the front filler piece, drill from underneath the inside of the cabinet, and then secure that piece with wood screws. Be sure the pieces are tight against the wall. Miter that end of this strip and then attach it to the backing wood with the nail gun. It is usually about 1.5 tall.
Where To Install Crown Molding In Your Home from media.improvenet.craftjack.io For more information, visit www.titebond.com. We spent a week at our mountain cottage a couple of weeks ago and one of the projects he finished was installing the crown molding on the cabinets. If you're planning on installing the trim yourself as a diy project, keep this important tip. This piece is attached to the top of the cabinets. So you've reached the end of your cabinet installation and are looking for the best method of installing crown on cabinets. Provide a nailing surface for crown moulding by attaching solid wood mounting strips to the top edges of the cabinets. Miter that end of this strip and then attach it to the backing wood with the nail gun. Since i am installing the molding only to the riser and not to the ceiling, i am going to install it ahead of time.
Mark the wall measurement on the bottom of the crown molding (image 2).
Fasten the crown molding to the top of the cabinet (we used a brad nailer). If you are handy with a hammer and have an eye for design, installing crown molding on cabinets can be a fantastic diy project for the weekend. There are certain styles of molding that this would be much easier to do or look better. I chose a torx (star) head because i tend to strip phillips head screws when applying pressure over my head. If you are installing it to the ceiling, you'll want to wait and install the molding on site. When installing the top of a cabinet, space the finish nails about 12 to 16 inches apart. We spent a week at our mountain cottage a couple of weeks ago and one of the projects he finished was installing the crown molding on the cabinets. The first piece needed is the carrier molding. Fortunately, anyone comfortable with a miter saw and brad nailer anyone can install crown molding. And it was so easy, i had to share the secret with you. Cabinet crown mouldings are the finishing touch for a kitchen renovation but you need to plan for them early in the project. Crown mouldings on varying cabinet heights. There is a simple solution.
Using a nail gun, nail the crown to the baseboard. (use one long strip for a row of cabinets the same depth.) then apply wood glue to each strip, nail it in place, and let dry. Cut the molding with a miter saw to the appropriate angle. We spent a week at our mountain cottage a couple of weeks ago and one of the projects he finished was installing the crown molding on the cabinets. So you've reached the end of your cabinet installation and are looking for the best method of installing crown on cabinets.
2020 Crown Molding Costs | Per Foot Prices & Cost To Install from cdn.homeguide.com If you are handy with a hammer and have an eye for design, installing crown molding on cabinets can be a fantastic diy project for the weekend. Check out our video review and demo of adding crown molding to your kitchen cabinets. Make sure that their size is the same as your moldings. And it was so easy, i had to share the secret with you. Make a square cut on the uncoped end of the crown moulding. This piece is attached to the top of the cabinets. Cut the molding with a miter saw to the appropriate angle. Measure the area of the wall or cabinet where you will install the molding, and lay the molding flat on the bottom of the miter saw, face side up.
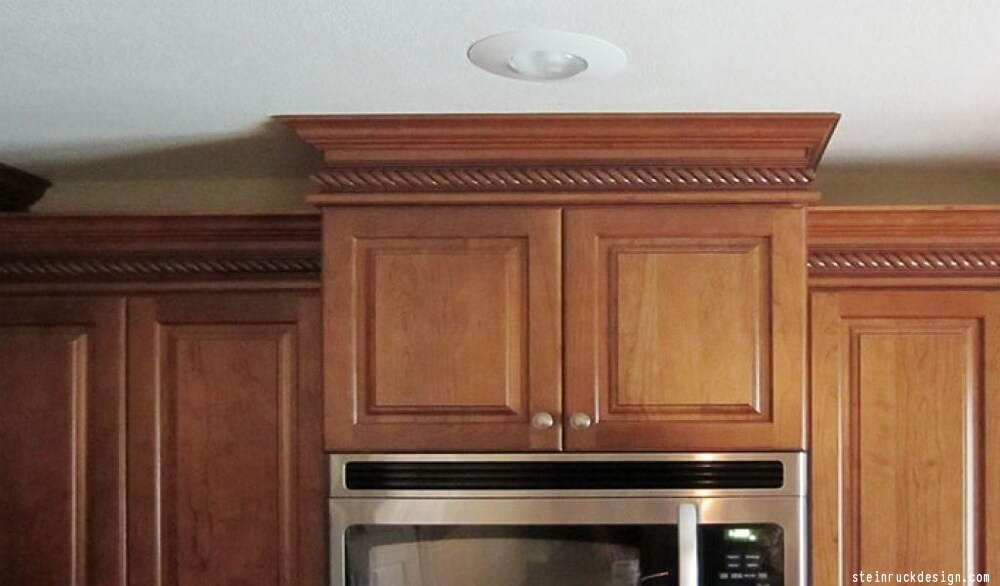
The molding also comes in handy for closing the gap between the top of the cabinets and the ceiling and for homeowners who want to create a sleek, finished look in their cook space.
You have to try it to believe me. If you're planning on installing the trim yourself as a diy project, keep this important tip. Make sure that their size is the same as your moldings. I cut straight 1x3s and placed them every few feet on top of the cabinets. Measure the length of the front and sides of your cabinet. Measure the area of the wall or cabinet where you will install the molding, and lay the molding flat on the bottom of the miter saw, face side up. Nail or glue the moulding to the wall and ceiling. Draw a small line just past your measurement indicating the direction and angle of the cut. If you are handy with a hammer and have an eye for design, installing crown molding on cabinets can be a fantastic diy project for the weekend. Using cabinets of varying heights or landscaping as. Unless there is ample room above the doors to attach a crown molding, or if you are using a very wide crown molding, you will need to install a nailer strip to support the installation. From the sides of the cabinet, nail the filler pieces in the place. The molding also comes in handy for closing the gap between the top of the cabinets and the ceiling and for homeowners who want to create a sleek, finished look in their cook space.
Using a nail gun, nail the crown to the baseboard. The first piece needed is the carrier molding. If you are installing it to the ceiling, you'll want to wait and install the molding on site. Mark all sides of the cabinet onto which you will be attaching crown moulding. From the sides of the cabinet, nail the filler pieces in the place.
How to Install Crown Molding on Cabinets - Sawdust Girl® from i0.wp.com But thanks to kreg** i finally figure out how to do it. Check out our video review and demo of adding crown molding to your kitchen cabinets. After that, you will need to file off the front and side stiles of your cabinet. Once the cabinets are bought (or built) and installed your options are limited to the situation you have in front of you. Lightly sand the rough edges with sandpaper. There is a simple solution. It is usually about 1.5 tall. Crown mouldings on varying cabinet heights.
Hold up the crown molding on the sides of the cabinet.
I cut straight 1x3s and placed them every few feet on top of the cabinets. But thanks to kreg** i finally figure out how to do it. Using cabinets of varying heights or landscaping as. Make a square cut on the uncoped end of the crown moulding. From the sides of the cabinet, nail the filler pieces in the place. You will need to do a 2 piece molding application: Using a nail gun, nail the crown to the baseboard. Miter that end of this strip and then attach it to the backing wood with the nail gun. The crown molding will have to ability to 'float' or 'ride' up and down on the carrier molding. Secure the crown molding when installing on a wall, use the pneumatic nailer to secure the crown molding at the wall studs. Next the crown molding is attached to the carrier piece. But the bad news is it takes some practice, careful measurements, and perhaps an extra stick or two of crown molding. You have to try it to believe me.